



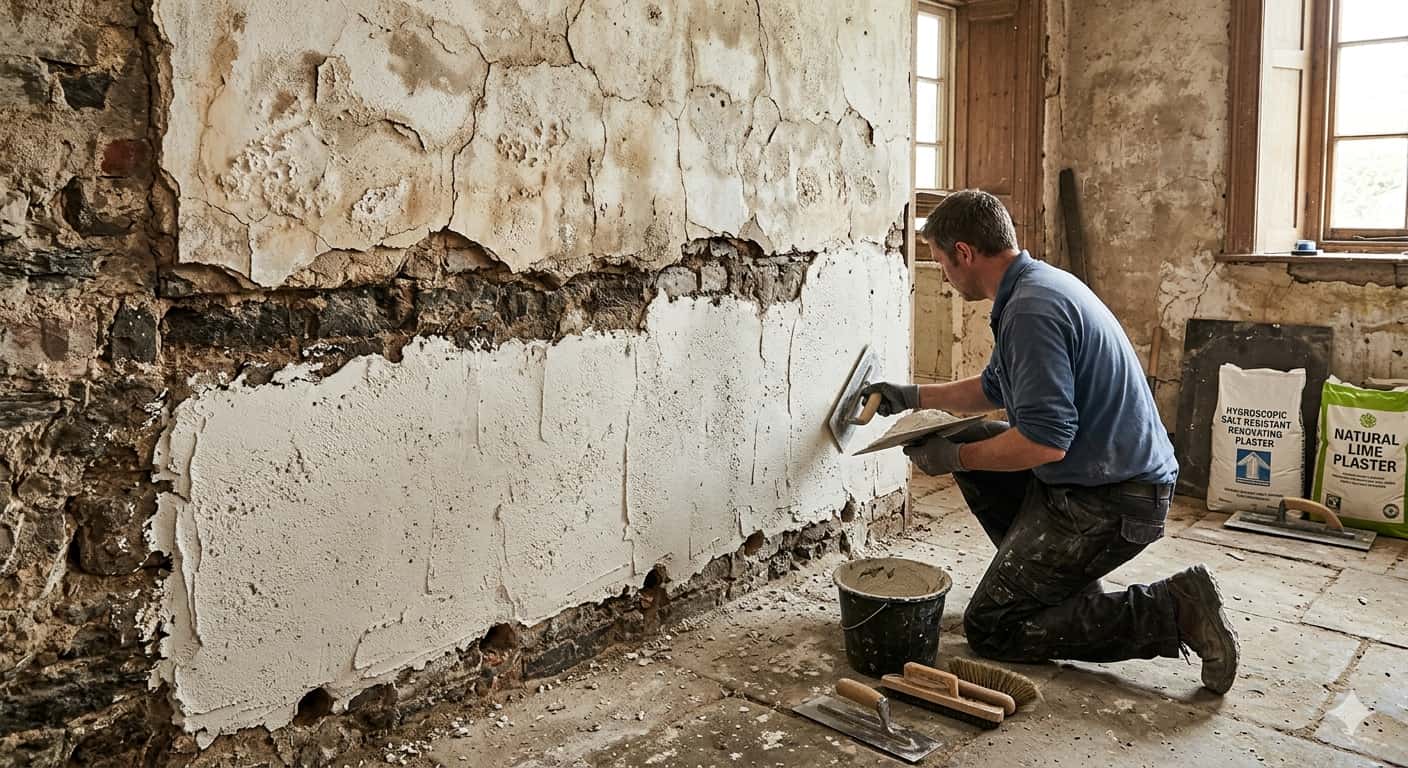
Many people misunderstand plastering after a damp-proof course injection as a simple finishing step. It plays a critical role in the long-term success of the treatment. Contractors often present a damp proof course injection as a solution to rising damp, and it often creates a chemical barrier that stops moisture from rising through masonry. However, installers often fail to explain at the point of sale that the injection only addresses part of the problem. The quality of replastering and the final wall finish determines whether the treatment succeeds or fails over the next twenty years.
Heritage Plastering regularly assesses walls where contractors have installed a DPC but damp problems have returned or never fully resolved. In almost every case, the DPC itself does not cause the issue; instead, the problem comes from what contractors apply to the wall immediately afterward.
Why Plastering After a Damp Proof Course Injection Is a Critical Step?
When rising damp travels up a wall, it does not just wet the plaster. It deposits salts within the plaster and masonry as the moisture evaporates. These salts, known as hygroscopic salts, remain in the wall even after the source of moisture is removed. They attract moisture from the air, which means a wall can continue to look and feel damp even after a successful DPC injection simply because of the salt contamination left behind.
If contractors leave the old plaster in place or apply a standard gypsum finish directly over the affected area, salts continue to draw moisture and the wall remains problematic. The new plaster will blister, bubble, and fail. The owner will assume the DPC did not work, when in reality the plastering was the issue.
Correct replastering after a DPC injection requires removing the old contaminated plaster to a height above the damp line, allowing the wall to start drying out, and then applying a renovating plaster system or an appropriate lime-based finish that can manage residual salt activity.
Which Plaster Should You Use After a DPC Injection?
The choice of plaster after a damp proof course injection depends on the type of wall, the severity of the salt contamination, and whether the property is a standard modern building or a period home.
In most modern properties, contractors apply a salt-resistant renovation plaster. These plasters handle residual hygroscopic salts and prevent them from causing the new finish to fail. They remain porous enough to allow continued drying while resisting salt crystallisation at the surface.
For older and period properties, particularly those built with solid stone or brick walls before the era of cavity construction, lime plaster for damp walls is often the most appropriate solution. Lime is naturally breathable, which means residual moisture can continue to move through and evaporate rather than becoming trapped. This is particularly important in buildings where the walls need to manage moisture as part of their normal function.
Cement-based plasters should be avoided on period properties after a DPC injection. The impermeability of cement means moisture becomes trapped behind it, which accelerates salt damage and can cause serious structural problems in older masonry.
How Long Should You Wait Before Replastering After a DPC?
Many people misunderstand this stage of the process. Damp proofing companies often suggest replastering can begin within weeks of injection. In reality, walls affected by rising damp hold significant moisture that must evaporate before contractors apply a permanent finish.
Contractors should allow walls to dry for at least three months before final plastering. Severe or long-term damp often requires six months or more of drying. Wall construction, masonry thickness, ventilation, and season all affect the drying time.
Contractors often rush this stage and cause most DPC replastering failures. Homeowners can apply a temporary finish for comfort, but they should delay permanent plastering until moisture readings confirm adequate drying.
The Drying Process and Why Ventilation Matters
During the drying period after a DPC injection, ventilation plays a critical role. Moisture moving out of the wall needs somewhere to go. If a property is sealed up, heating run continuously, or the walls covered with impermeable materials, the moisture cannot escape and the drying time extends significantly.
Opening windows where possible, using dehumidifiers with caution (they can cause too-rapid drying which leads to cracking), and ensuring air circulation around the affected walls all support the drying process. Turning heating up high to force the wall to dry quickly is not recommended. It causes the outer surface to dry while the core remains wet, which can lead to cracking and surface failure in the new plaster.
Understanding how to stop plaster cracking when drying is directly relevant here. The principles that apply to standard plaster drying apply equally, and in some ways more critically, to walls coming out of a damp condition.
The Risk of Using the Wrong Plastering Contractor After a DPC
Not every plastering contractor understands the specific requirements of post-DPC work. A general plasterer experienced in new build or standard renovation work may apply a finish that is entirely appropriate in most contexts but completely wrong for a wall recovering from rising damp.
The consequences of this mistake are not always immediate. A plaster that looks fine for six months can begin to fail within a year as salt activity at the surface continues. By that point, the original damp proofing company has usually moved on, leaving the property owner uncertain about the cause. The owner must then determine whether the DPC failed or the plastering caused the problem.
Before appointing a plastering contractor after a DPC injection, ask specifically about their experience with post-DPC work and salt-contaminated walls. Ask what plaster system they propose to use and why. A contractor who cannot explain the reasoning behind their material choice is unlikely to have the knowledge needed to get this right.
Choosing plastering services for your home renovation involves more than comparing prices. The technical knowledge of the contractor, particularly on specialist work like this, is what determines whether the result lasts.
What About Period Properties and Listed Buildings?
For period properties, the question of what to apply after a DPC injection becomes even more nuanced. Many older buildings do not have a simple rising damp problem that a chemical injection will resolve. The walls of a Victorian or Georgian house were designed to function without a damp proof course. They managed moisture through breathability across the entire wall construction.
Contractors who introduce a chemical DPC and apply impermeable plaster often make conditions worse. This approach disrupts natural moisture movement that previously kept the building in balance. In many cases, a holistic approach using breathable lime plaster throughout works better than combining a chemical DPC with renovation plaster.
This is a conversation worth having with a specialist before any work begins, particularly if you own a period property in Gloucestershire.
Renovation Plaster Versus Lime: Which Is Right for Your Property?
The decision between a proprietary renovation plaster and a lime-based system comes down to the property type, the wall construction, and the long-term goals for the building.
Renovation plasters are designed for salt management in modern or semi-modern structures. They work well, dry relatively quickly, and can accept a standard gypsum skim finish. For a 1970s house with a failed DPC, a renovation plaster system is often the most practical solution.
For anything pre-1919, or for properties where breathability is a design requirement, lime plaster versus gypsum plaster is the more relevant comparison. Lime allows the wall to continue functioning as it was intended to, managing moisture without trapping it.
Frequently Asked Questions
How soon can I replaster after a damp proof course injection?
As a general rule, allow at least three months for the wall to begin drying before applying a permanent plaster. In cases of serious long-term damp, six months or more may be needed. Moisture readings should guide the decision rather than a fixed timeframe.
Why has my new plaster failed after a DPC injection?
In most cases, salt contamination in the wall causes this problem. If contractors do not remove the old plaster before replastering, or if they apply a standard gypsum finish without treating the salts, hygroscopic salts draw in moisture and make the new plaster blister or fail.
Can I use normal plaster after a damp proof course?
Standard gypsum plaster is not suitable for use on walls that have been subject to rising damp. A renovation plaster system or lime-based plaster is required to manage residual salt activity and allow the wall to continue drying.
Is lime plaster better than renovation plaster after a DPC?
For period and historic properties, lime is generally the better choice because it is breathable and compatible with older wall construction. For modern properties, a proprietary renovation plaster is often more practical. The right choice depends on the building type and wall construction.
Should you remove old plaster before replastering after a DPC?
Contractors should remove old plaster in almost all cases. Old plaster contains hygroscopic salts that cause new plaster to fail. Best practice requires removing plaster above the damp line before replastering after a DPC injection.
Does a damp proof course injection always work?
A correctly installed DPC injection is effective at stopping capillary rise of moisture through the wall. However, it does not remove the salts already present in the plaster or masonry, and it does not address penetrating damp from external sources. The replastering stage and addressing any external moisture sources are essential parts of the complete solution.